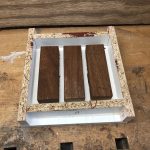
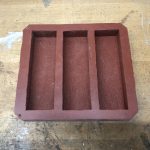
Introduction – Making your first mould…
For casting resin you need a mould! Sounds obvious? But for some of the things wood-turners make in particular, off the shelf moulds don’t exist or you need a bespoke mould or even a mould you can use over and over. Examples would be casting resin pen blanks or cabochons for letting into turned boxes as features.
Moulds for resin are generally made of silicone rubber. This material comes in many forms as a two-part liquid, which you combine to start a chemical reaction which sets the silicone. The final silicone rubber can have different properties, which depend on the use you’re planning. There are high-temperature silicone’s which you can even use with hot molten pewter! Two other factors to consider are mould re-use and mould flexibility. If you plan to keep re-using the mould for repeated pen blank production, look for a silicone that specifically says it is designed for multiple uses, otherwise it is likely the mould will tear after a few uses. The last feature we’ll discuss here is the flexibility. In terms of measuring flexibility or hardness, a Shore scale is used which is defined here. Really soft rubbers need a backing to aid their rigidity. We need something firm enough to keep its shape and support the resin, but flexible enough to allow de-moulding. Something around Shore A30 is a reasonable balance.
Moulding or Containing the liquid silicone
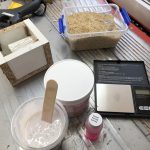
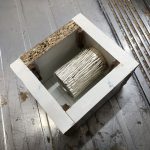
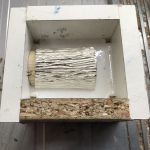
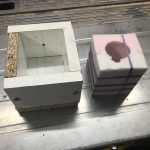
For simple moulds, you can recycle most plastic boxes or tubs. For more bespoke moulds you need to make a box, perhaps with forma’s to shape the setting silicone. The surface of the box needs to be smooth, so the silicone doesn’t readily stick, even without a mould release agent. I use cheap melamine shelving board, as it cuts easily and can be screwed together. The joints I seal with budget silicone bathroom sealant from a push tube or a hot melt glue gun. When your mould is finished, you need to make sure there are no leakage points! The mixed silicone may appear viscous, but it has a way of finding any gap and seeping out!
Two-Part Moulds
On rare occasions, I’ve had a need to cast in resin an uneven shape, perhaps something vaguely cylindrical. In this scenario, you need to cast the mould in two parts, usually roughly equal in size and split along a plane that can hide the join. Typically you cast one half, let it cure, while establishing some register points to aid locating the two halves together accurately. When the first half is cured, treat this half’s mating surface with either a specific rubber to rubber mould release or even Vaseline, which I have found works well. Then pour in the second batch of silicone and leave to cure.
Mixing, de-gassing and pouring
Finally, we get to mix our silicone and catalyst causing the rubber to cure. There are many products available, some will require degassing after mixing, some are designed to expel the air or at least not let it affect the finished surfaces of the cured mould. Some silicone’s are mixed by weight, some by volume, just follow the instructions. Make sure you have taken note of the cure time for the silicone you have, this can vary from minutes to hours. You must get the mix into the mould while it is still fluid and not becoming viscous. Make sure the two parts are thoroughly mixed, some silicone’s come in two colours to make it easier to see the combined even colour, some are clear additives which become invisible when added to the main component. Two tips. Make sure you use your stirrer to get into the corners of your mixing container and really scrape the sides into the mix. Next, mix steadily and evenly, try to incorporate as little air as possible, unlike beating eggs!
If your chosen silicone requires degassing, put the mixed silicone in the vacuum chamber and slowly apply vacuum. You will be surprised how much the volume expands as the air is drawn out, so manage the air flow so the mixer container in the chamber doesn’t overflow!
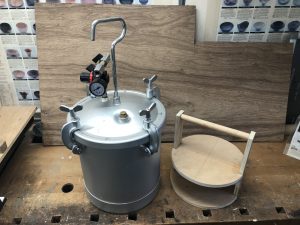
Now your mix is ready for the mould, you need to pour it in slowly in one place, allowing the silicone to flow over the mould, hopefully not trapping any air. Moving the pour around can cause bubbles to be caught in the silicone liquid which needs to be avoided. Some makers recommend pouting the liquid silicone from a slight height rather than next to the mould top, so a fine stream of liquid is gradually added to the mould, their belief is this surprisingly doesn’t trap air.
Finally, the mould can be tapped, jiggled or even put on a gently vibrating surface to encourage any air bubbles to the surface. Any bubbles that don’t pop, but are visible under the surface, can be popped with a cocktail stick. Some dense silicone’s may suggest a second degassing, placing the mould in the vacuum chamber, but with the choice of products available, I would avoid this option.
Conclusion
The moulds for this step, don’t need to be pretty, but functional. Nevertheless, I like to make them reasonably true so the silicone mould produced is itself evenly shaped, so casting the resin in the silicone mould is also trouble-free. Well, at least from mould issues, casting itself has a whole lot of other considerations. We will look at those in another article…


